
Oracle has recently made it possible to customize their out-of-the-box content field editor. To celebrate, I’m going to show you how to put your own CKEditor instance inside the editor Oracle now lets us modify. I’ll also go through the steps to build a CKEditor plugin that opens the Oracle Content Management (formerly called Oracle Content and Experience (OCE)) content picker. Let’s get started.
Adding the Component
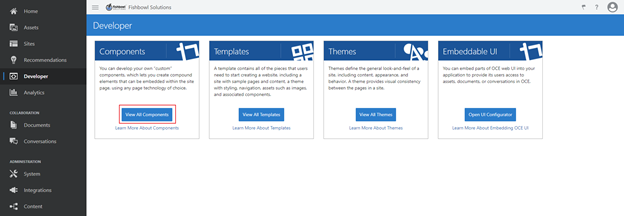
To begin, go to the Developer section of OCM and click ‘View all Components’.
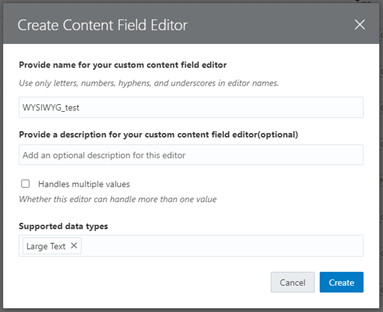
Next, create the content item by clicking ‘Create’ in the top right corner of the developer tab. Then choose ‘Create Content Field Editor’.

Choose ‘Large Text’ as the supported data type and name your component.
Click on your new content field editor and then go into the ‘Assets’ folder. Once you’re there, check the box next to ‘edit.html’ and download the file. Don’t worry about not having the plugins folder, we’ll get to that later.

Make Changes to edit.html
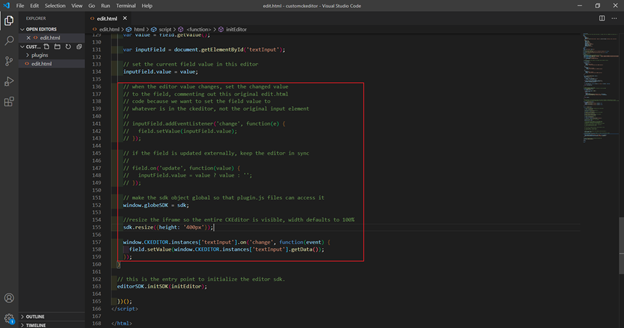
Next, we need to make changes to the edit.html file. The code that needs to be added is highlighted in the screenshots below. You can also take each of the highlighted sections from the code snippets beneath the images.
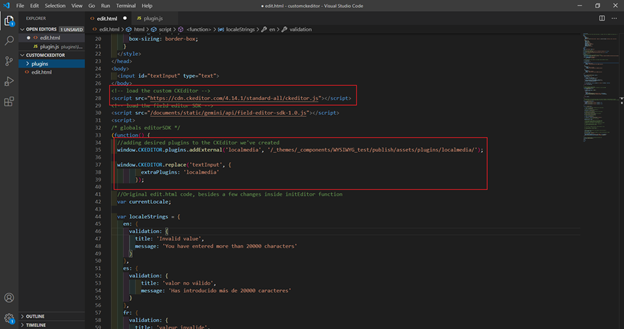
Code snippet 1:
|
<!– load the custom CKEditor –> <script src=”https://cdn.ckeditor.com/4.14.1/standard-all/ckeditor.js”></script> |
Code snippet 2:
|
//adding desired plugins to the CKEditor we’ve created, we will go //over how to set this plugin up later window.CKEDITOR.plugins.addExternal(‘localmedia’, ‘/_themes/_components/WYSIWYG_test/publish/assets/plugins/localmedia/’);
window.CKEDITOR.replace(‘textInput’, { extraPlugins: ‘localmedia’ });
|
Code snippet 3:
|
// make the sdk object global so that plugin.js files can access it window.globeSDK = sdk;
//resize the iframe so the entire CKEditor is visible, width defaults to 100% sdk.resize({height: ‘400px’});
window.CKEDITOR.instances[‘textInput’].on(‘change’, function(event) { field.setValue(window.CKEDITOR.instances[‘textInput’].getData()); });
|
After this, you need to add the CKEditor plugins you want. Create a plugins folder at the same level as your edit.html file. Inside this file, you will want to create a folder for every plugin you plan to use.
Note: Several online plugins have a parent folder of [plugin name].[version] and the actual plugin folder is at the next level. You need to make sure to only grab the actual plugin folder. The name of your plugin folder must match the name you give to addExternal and extraPlugins. The file plugin.js must also be a direct child within the folder.
Adding your plugins
You can add any plugin to your CKEditor, but I’m going to show you how to write and use a plugin that opens up the OCM content picker. I started with the timestamp plugin as a template because it’s a basic plugin for which CKEditor provides a tutorial.
Once I got that up and running, I made a copy of the timestamp folder and replaced ‘timestamp’ with ‘localmedia’ everywhere within the files, including file names. I used the free photo-video icon from fontawesome (and converted it to a .png using AdobeXD) as the new localmedia.png file within the icons folder. Be sure to update the parent folder name to ‘localmedia’; this is a crucial step.
Next, I removed all the existing code from the addCommand function. This is where we’ll put the logic for opening the OCM content picker when a user clicks on your plugin’s respective icon.

Code snippet 4:
|
editor.addCommand( ‘insertLocalMedia’, { exec: function( editor ) { //changes go here } }); |
Since we made the sdk object global, we can access it within our plugin.js files and use any of the methods that come with it. The method we’ll be using is openContentPicker(). You can see how we use it to get photos and videos into the CKEditor with the code below.
Code snippet 5:
|
editor.addCommand( ‘insertLocalMedia’, { exec: function( editor ) { globeSDK.openContentPicker().then(function(data) { if(data.mimeType === ‘video/mp4’) { let vidElem = `<div class=”ckeditor-html5-video” data-responsive=”true” style=”text-align: center;”> <video controls=”controls” style=”max-width: 100%; height: auto;” controlslist=”nodownload” src=”https://[YOUR_OCM_DOMAIN]/content/published/api/v1.1/assets/${data.id}/native/${data.name}?channelToken=570368d2786de486288b2318118bf78b”> </video> </div><p> </p>` window.CKEDITOR.instances[‘editor1’].insertHtml(vidElem); } else { window.CKEDITOR.instances[‘editor1’].insertHtml(‘<img src=”https://[YOUR_OCM_DOMAIN]/content/management/api/v1.1/assets/’ + data.id + ‘/native”/>’); } }).catch(function(err) { console.log(‘ERROR’); console.log(err); }); } }); |
Adding your files to OCM
Now, you need to add your files to the custom component you created earlier. In OCM, go into the developer tab, click ‘View all Components’, select your component, and then click on the ‘Assets’ folder.
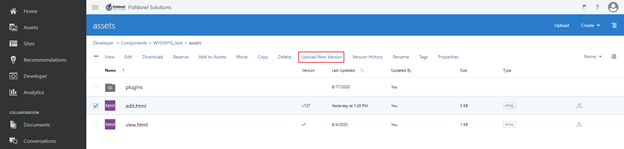
The first thing we will do after that is replace the current edit.html file with the one we updated. Click the check mark next to the file, select ‘Upload New Version’ from the options above, and then select the file you downloaded and edited.
Following that, we’ll click ‘Create’ in the top right corner, select ‘Folder’, and then name this new folder ‘plugins’ (mimicking the setup we have for our project outside of OCM). Once you’ve done that, your assets folder should look like the image below.

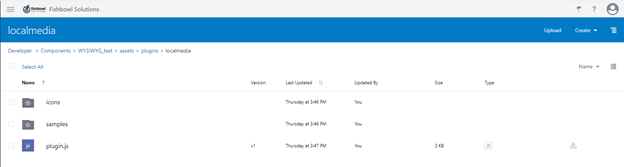
Within the plugins folder, you’ll add a folder for each plugin you want to include. The folder structure should look exactly like it does in your file system (minus any .md files). You can see what my localmedia plugin folder includes in the following image. Make sure to put the appropriate files/folders into the ‘icons’ and ‘samples’ folders as well.
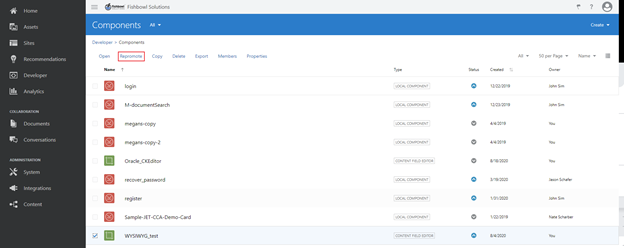
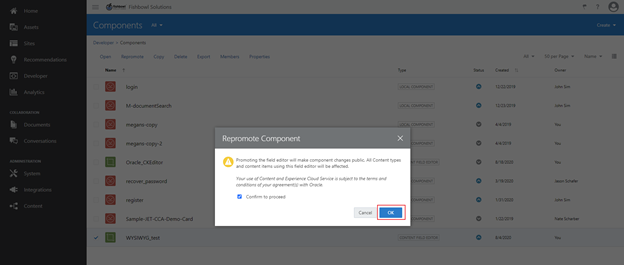
Last, but not least, you’ll need to go back to the ‘Components’ view, check your component’s box, click ‘repromote’, confirm the action, and click ‘OK’. You’ll need to do this every time you make changes within your component. Hopefully, this step won’t be necessary someday, but until then, I have turned this process into muscle memory.
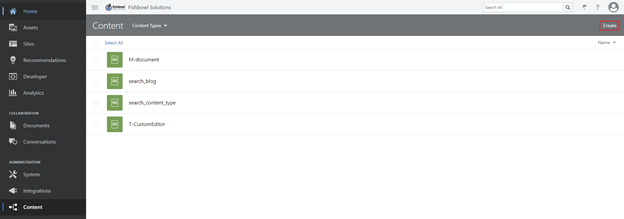
Adding your files to OCM
o test out your custom editor, go to the ‘Contents’ tab on the left-hand side of OCM. Select ‘Content Types’ in the dropdown, then click ‘Create’ in the top right corner.
Give your component a name, then click ’OK’. Once you’ve named your component, a screen will automatically slide out that asks you to define your content item’s data fields. Drag ‘Large Text’ into the definition box. Once you do that, the pop up below should appear.
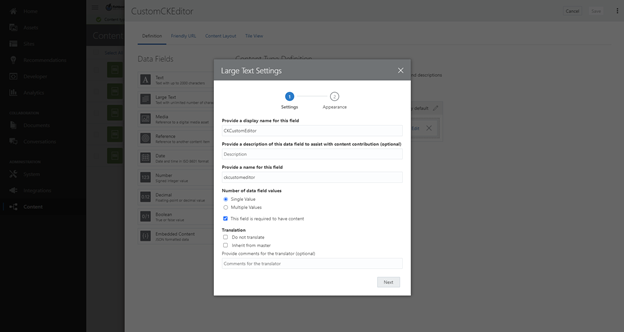
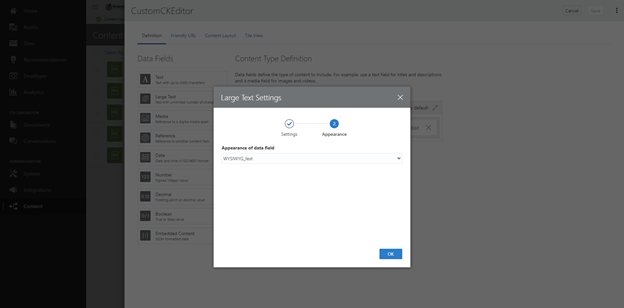
Give your large text field a display name and a name, then click ‘Next’. Now, you’ll select the custom editor component you’ve created from the top dropdown menu. Once you have selected it, the remaining fields should disappear. Click ‘OK’, then ‘Save’ in the top right corner.
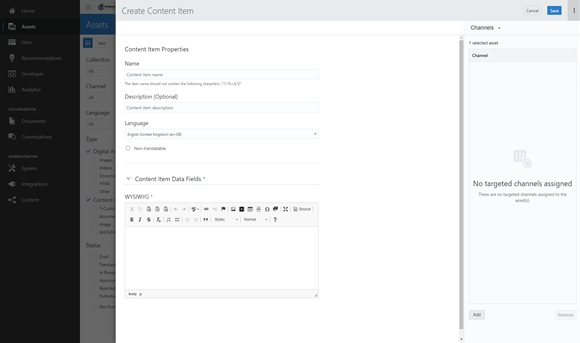
In order to use the content type you just created, go to the ‘Assets’ tab on the left-hand side, click ‘Create’ in the top right corner, and then select ‘Create a New Content Item’. Select the content type you just created in the dropdown, and then click ‘OK’. Now, you should see your very own CKEditor. If you click on your plugin icon, the OCM Content Picker should slide out and allow you to insert whatever content you select.
Because you now have a custom CKEditor component within OCM, you can add any plugin you want. You can choose from the many plugins available online or write your own. If you write your own you can access OCM content using the content picker. You are no longer limited to the out of the box editor toolbar.
If you have questions relating to any of the content above, or OCM in general, reach out to us. Learn more about how we support OCM (also formerly called Oracle CX Content) here, or write to us at info@fishbowlsolutions.com.